Adding in-app surveys to a FlutterFlow app
Jan 13, 2023
Reading time: 10 min

“Feedback is the breakfast of champions.” said Ken Blanchard. He is pretty right because receiving and providing feedback has always been essential in our lives. Why? It helps you to improve yourself as a personality or a professional, to bring you in the right direction on the way to achieving a goal, generate growth and a good work environment, or in general, just to make things better.
There are many examples of very successful products that have been developed entirely or almost entirely based on the potential customers’ feedback.
Also, having feedback from your current users can support you in turning your existing product into a complete masterpiece. Of course, this is possible when you have the right tool. And here MobSur comes.
This blog post will teach you how to embed MobSur in your Flutter application using FlutterFlow.
For those of you who don’t know what FlutterFlow is, let me provide you with some details about it. It allows you to build native cross-platform applications directly from your browser. The visual drag-and-drop editor helps you decrease the time of development drastically.
Now let’s continue with the main topic of our article - MobSur.
What is MobSur?
MobSur is an in-app user feedback platform that allows you to embed different surveys into your mobile app. The types of applications that we currently support are native iOS apps, native Android apps, or one of the most popular frameworks for building cross-platform applications - Flutter.
One of the best advantages of MobSur is that it can help you easily integrate a great feedback survey into your mobile application with almost no code. The types of questions and answers are entirely up to you.
Prerequisites
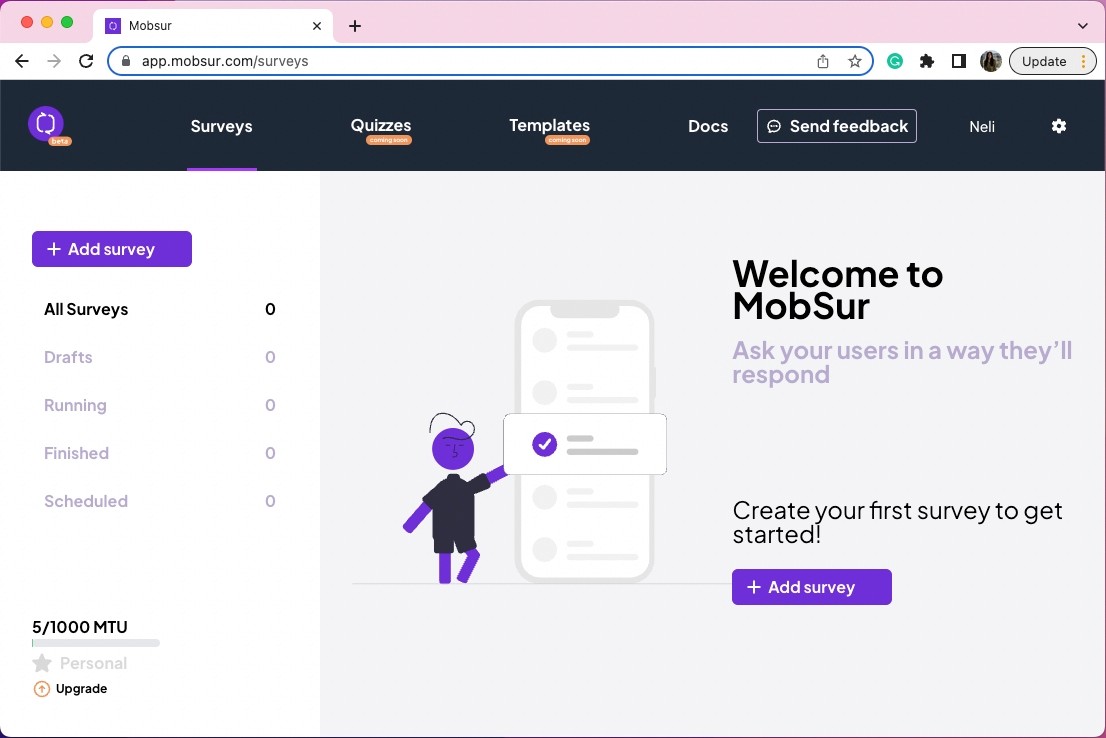
Firstly, if you haven't already. Go ahead and create your account from the register page. If you already have an account, log in to your dashboard.
Click the Add Survey button to create your first survey.
You need to fill in the survey name. In this case, let's name it “my-first-survey”.
There is a welcome page on each survey. You can customise it to fit your use case. A survey is more likely to be answered by your users if you give them some context about what they can expect from the survey. A good practice is to also add some idea about how long it will take them to complete the survey.
Then, continue with adding your questions. For example:
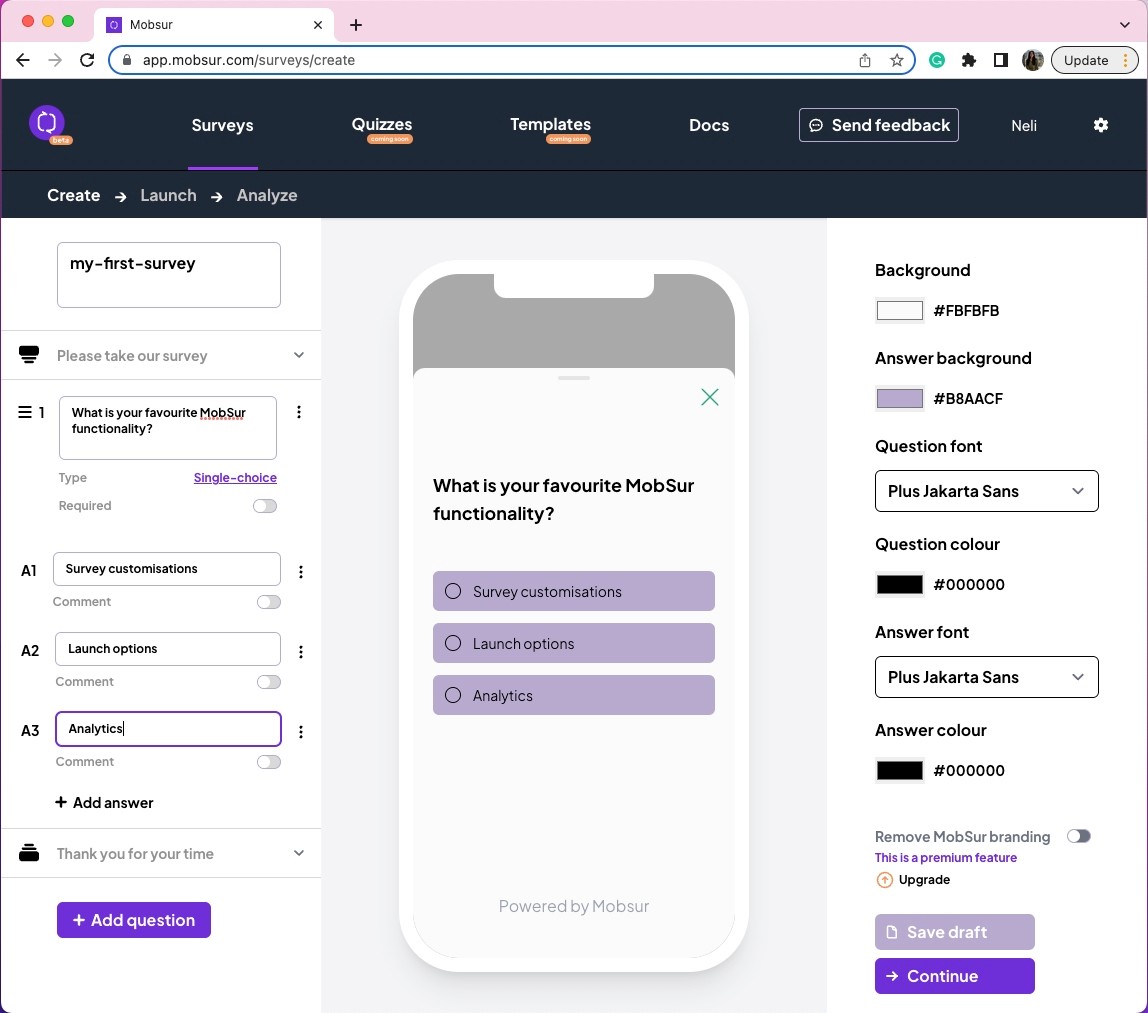
In the right menu, you will find the styling options, while the different settings for the questions and answers are in the left menu. For example, you can define the type of question - Single-choice or Multiple-choice or if the question is required or not. When it comes to the answers, you have the option to add a comment to each of them.
Once you are done with adding the questions, you can also change the text of the outro page of the survey. Just like the welcome page, it can be disabled.
When you're done adding questions and changing the styling to match your app click on "continue" to continue and set the launch options for the survey. If you're not yet ready to continue, don't forget to save your survey as a draft by clicking on "save draft".
On the next page, you will find all the possible launch options - the event which will trigger the survey, the targeting options as well as the delivery settings. have to set the name of the event that will trigger the survey.
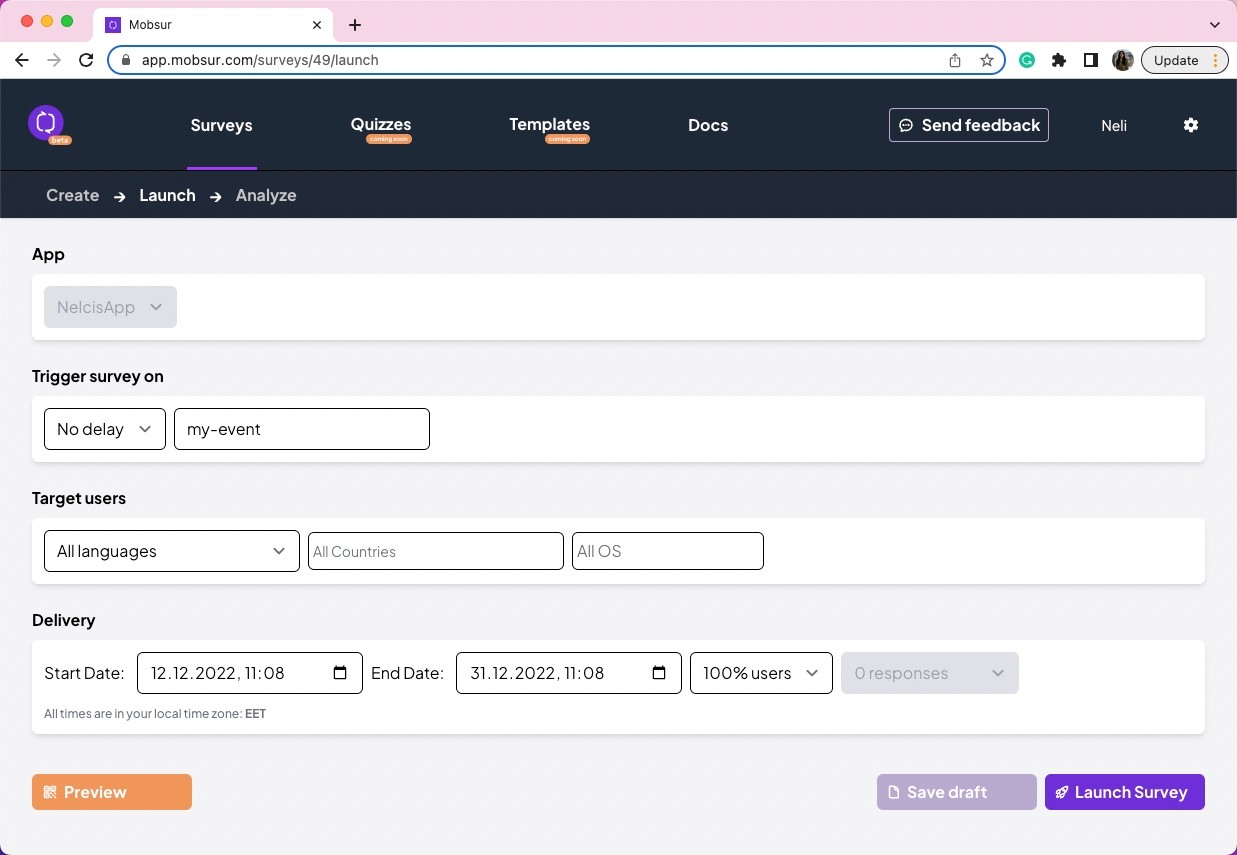
You have the option to set the target users’ language, country, OS, and so on. Don't forget to add the event trigger and make sure it exactly matches the one in you will be sending from the app. Let's name our event’s “my-event”, and we will use it later during the FlutterFlow's application setup.
Once you are ready hit "Launch Survey" and start collecting feedback from your users. You can also use the "preview" functionality to preview how your survey will look like on a device using the MobSur Preview app.
For more details, check out the Getting Started section on our documentation page.
Adding surveys to your FlutterFlow application
Let's start by creating a new project in FlutterFlow
After you have created the project add 2 custom actions - one for the MobSur SDK setup and another for logging:
setupMobSurSDK -> it should be called when the page that displays the survey is initialized. The method should have two parameters - appId and clientId. You can find your appId in the settings section of the dashboard under Apps https://app.mobsur.com/user/apps. The clientId is the id of the user. It could be any random string. In general, the id is defined by you and it is used to distinguish different users answering the surveys.
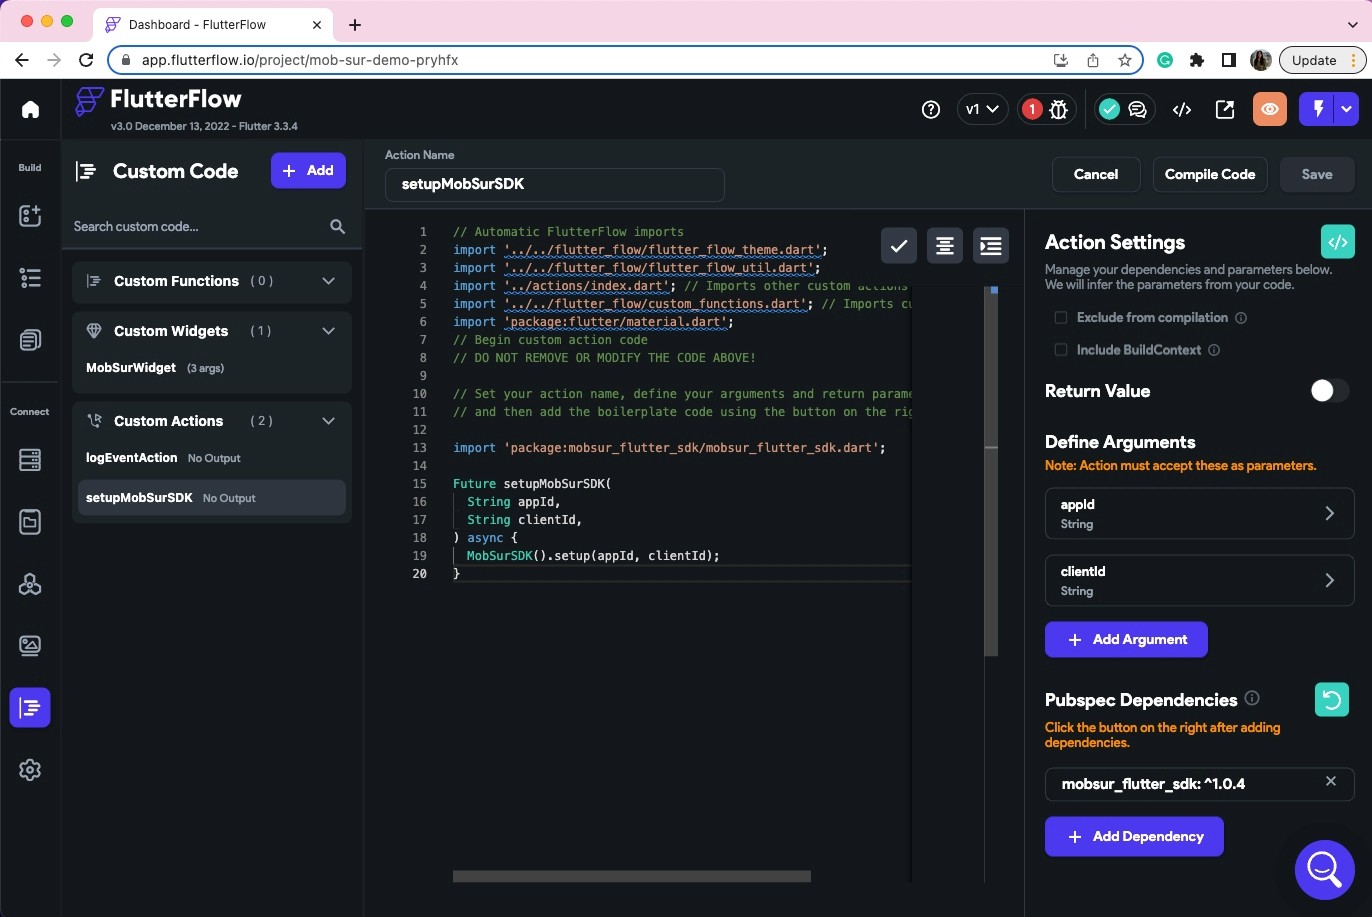
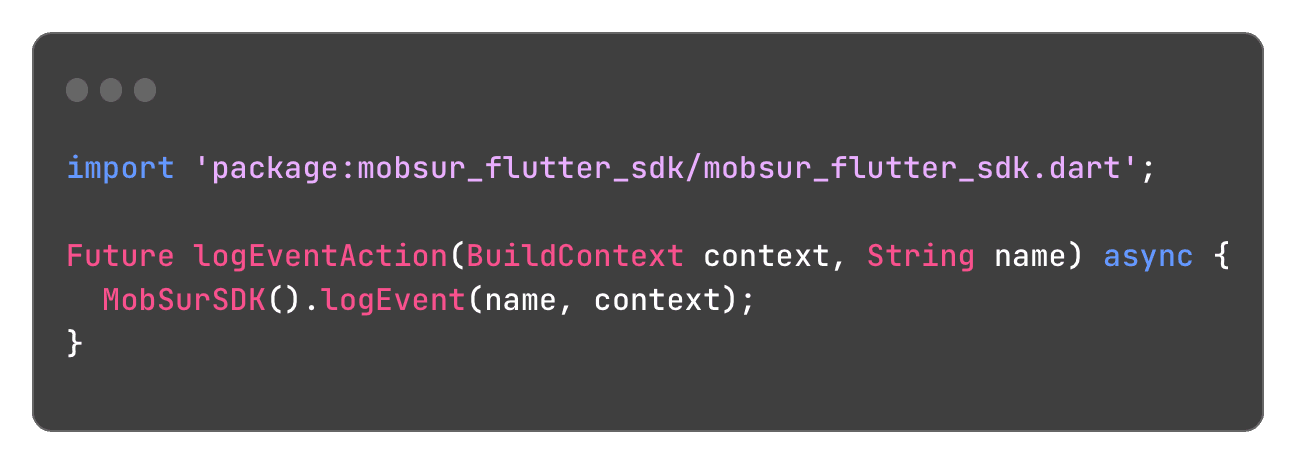
logEventAction -> we will use this method to start the survey when an event is logged. For this demo, we will use the button click. The function has 2 parameters - the name of the event (the one that we filled in the step7 of the prerequisites - “my-event”) and the build context. Below is the code that we need for the method:
Now navigate to the WidgetTree and select the HomePage. Click on the Actions tab and select the setupMobSurSDK and fill in the appId and the clientId.
Go back to the UI builder and firstly, add a Row to the screen. From the properties grid, you may want to set the Main Axis Alignment and the Cross Axis Alignment.
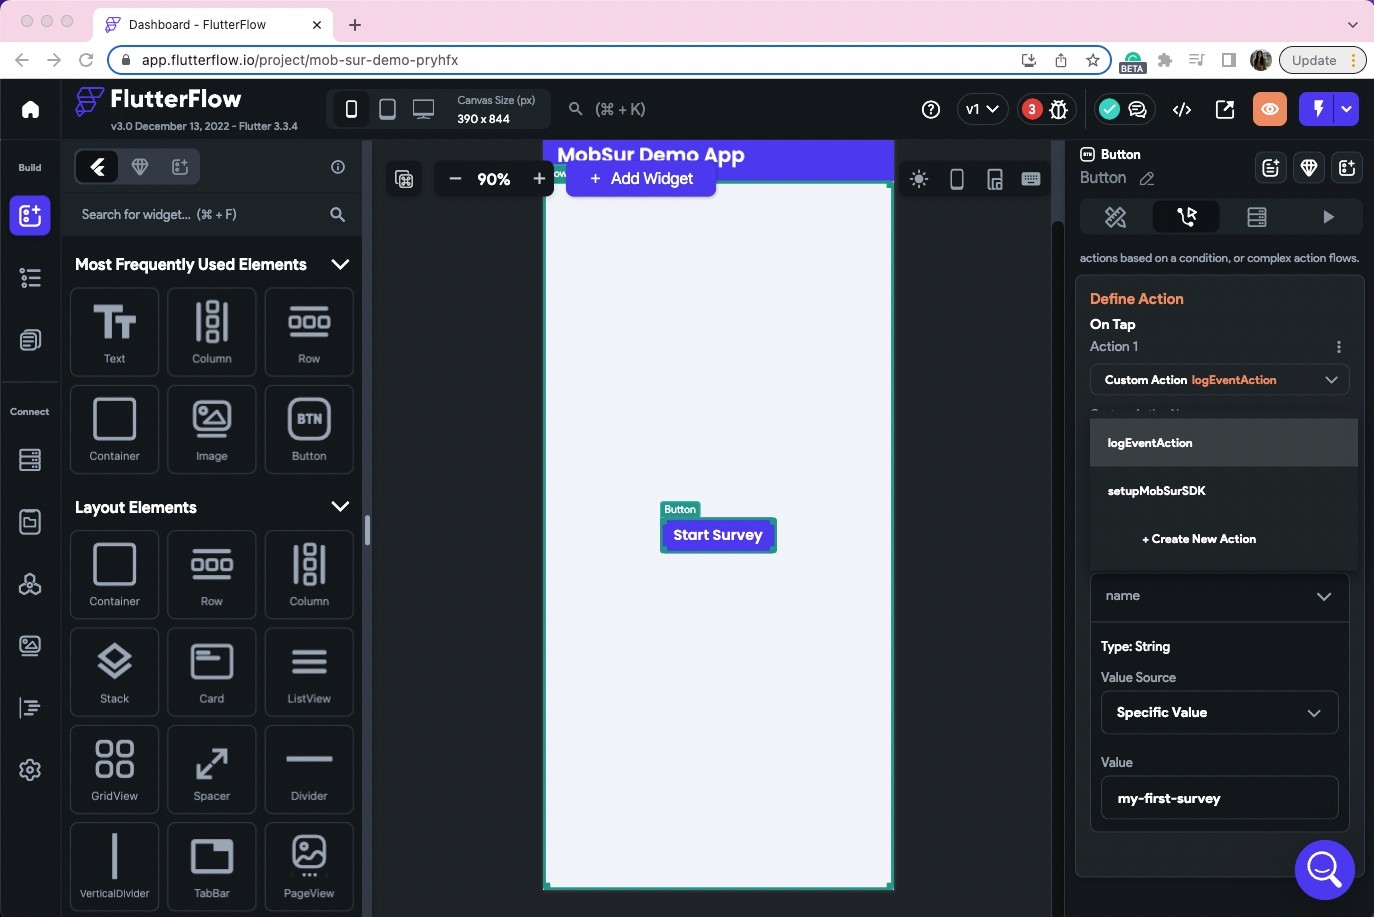
Add a Button inside of the Row and set its Action to be the logEventAction. Don’t forget to fill in the name of the event (“my-event”).
To test the survey, download the application’s code and run it on a simulator or your device.
Official Documentation
More information on how to integrate MobSur into your native iOS/Android app or Flutter app (without using FlutterFlow) can be found on our official documentation page.
Support
If you experience any issues or difficulties while embedding MobSur, you can contact our sales time through the Discord channel or by writing an email to support@mobsur.com.
“Feedback is the breakfast of champions.” said Ken Blanchard. He is pretty right because receiving and providing feedback has always been essential in our lives. Why? It helps you to improve yourself as a personality or a professional, to bring you in the right direction on the way to achieving a goal, generate growth and a good work environment, or in general, just to make things better.
There are many examples of very successful products that have been developed entirely or almost entirely based on the potential customers’ feedback.
Also, having feedback from your current users can support you in turning your existing product into a complete masterpiece. Of course, this is possible when you have the right tool. And here MobSur comes.
This blog post will teach you how to embed MobSur in your Flutter application using FlutterFlow.
For those of you who don’t know what FlutterFlow is, let me provide you with some details about it. It allows you to build native cross-platform applications directly from your browser. The visual drag-and-drop editor helps you decrease the time of development drastically.
Now let’s continue with the main topic of our article - MobSur.
What is MobSur?
MobSur is an in-app user feedback platform that allows you to embed different surveys into your mobile app. The types of applications that we currently support are native iOS apps, native Android apps, or one of the most popular frameworks for building cross-platform applications - Flutter.
One of the best advantages of MobSur is that it can help you easily integrate a great feedback survey into your mobile application with almost no code. The types of questions and answers are entirely up to you.
Prerequisites
Firstly, if you haven't already. Go ahead and create your account from the register page. If you already have an account, log in to your dashboard.
Click the Add Survey button to create your first survey.
You need to fill in the survey name. In this case, let's name it “my-first-survey”.
There is a welcome page on each survey. You can customise it to fit your use case. A survey is more likely to be answered by your users if you give them some context about what they can expect from the survey. A good practice is to also add some idea about how long it will take them to complete the survey.
Then, continue with adding your questions. For example:
In the right menu, you will find the styling options, while the different settings for the questions and answers are in the left menu. For example, you can define the type of question - Single-choice or Multiple-choice or if the question is required or not. When it comes to the answers, you have the option to add a comment to each of them.
Once you are done with adding the questions, you can also change the text of the outro page of the survey. Just like the welcome page, it can be disabled.
When you're done adding questions and changing the styling to match your app click on "continue" to continue and set the launch options for the survey. If you're not yet ready to continue, don't forget to save your survey as a draft by clicking on "save draft".
On the next page, you will find all the possible launch options - the event which will trigger the survey, the targeting options as well as the delivery settings. have to set the name of the event that will trigger the survey.
You have the option to set the target users’ language, country, OS, and so on. Don't forget to add the event trigger and make sure it exactly matches the one in you will be sending from the app. Let's name our event’s “my-event”, and we will use it later during the FlutterFlow's application setup.
Once you are ready hit "Launch Survey" and start collecting feedback from your users. You can also use the "preview" functionality to preview how your survey will look like on a device using the MobSur Preview app.
For more details, check out the Getting Started section on our documentation page.
Adding surveys to your FlutterFlow application
Let's start by creating a new project in FlutterFlow
After you have created the project add 2 custom actions - one for the MobSur SDK setup and another for logging:
setupMobSurSDK -> it should be called when the page that displays the survey is initialized. The method should have two parameters - appId and clientId. You can find your appId in the settings section of the dashboard under Apps https://app.mobsur.com/user/apps. The clientId is the id of the user. It could be any random string. In general, the id is defined by you and it is used to distinguish different users answering the surveys.
logEventAction -> we will use this method to start the survey when an event is logged. For this demo, we will use the button click. The function has 2 parameters - the name of the event (the one that we filled in the step7 of the prerequisites - “my-event”) and the build context. Below is the code that we need for the method:
Now navigate to the WidgetTree and select the HomePage. Click on the Actions tab and select the setupMobSurSDK and fill in the appId and the clientId.
Go back to the UI builder and firstly, add a Row to the screen. From the properties grid, you may want to set the Main Axis Alignment and the Cross Axis Alignment.
Add a Button inside of the Row and set its Action to be the logEventAction. Don’t forget to fill in the name of the event (“my-event”).
To test the survey, download the application’s code and run it on a simulator or your device.
Official Documentation
More information on how to integrate MobSur into your native iOS/Android app or Flutter app (without using FlutterFlow) can be found on our official documentation page.
Support
If you experience any issues or difficulties while embedding MobSur, you can contact our sales time through the Discord channel or by writing an email to support@mobsur.com.